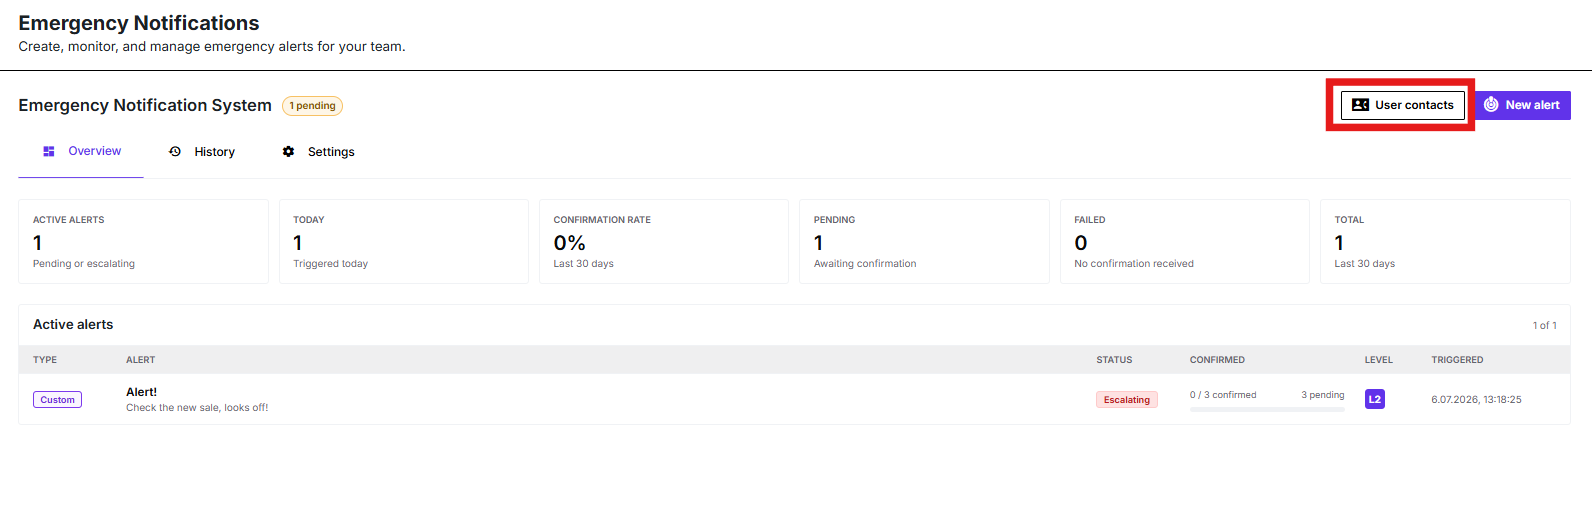
Emergency alerts in PhoneHQ can be configured, triggered, and managed by an administrator from the Admin Panel. To create or manage an alert, go to the Emergency Notifications section in the admin area, where administrators can access the overview, alert history, settings, user contacts, and the option to create a new alert.
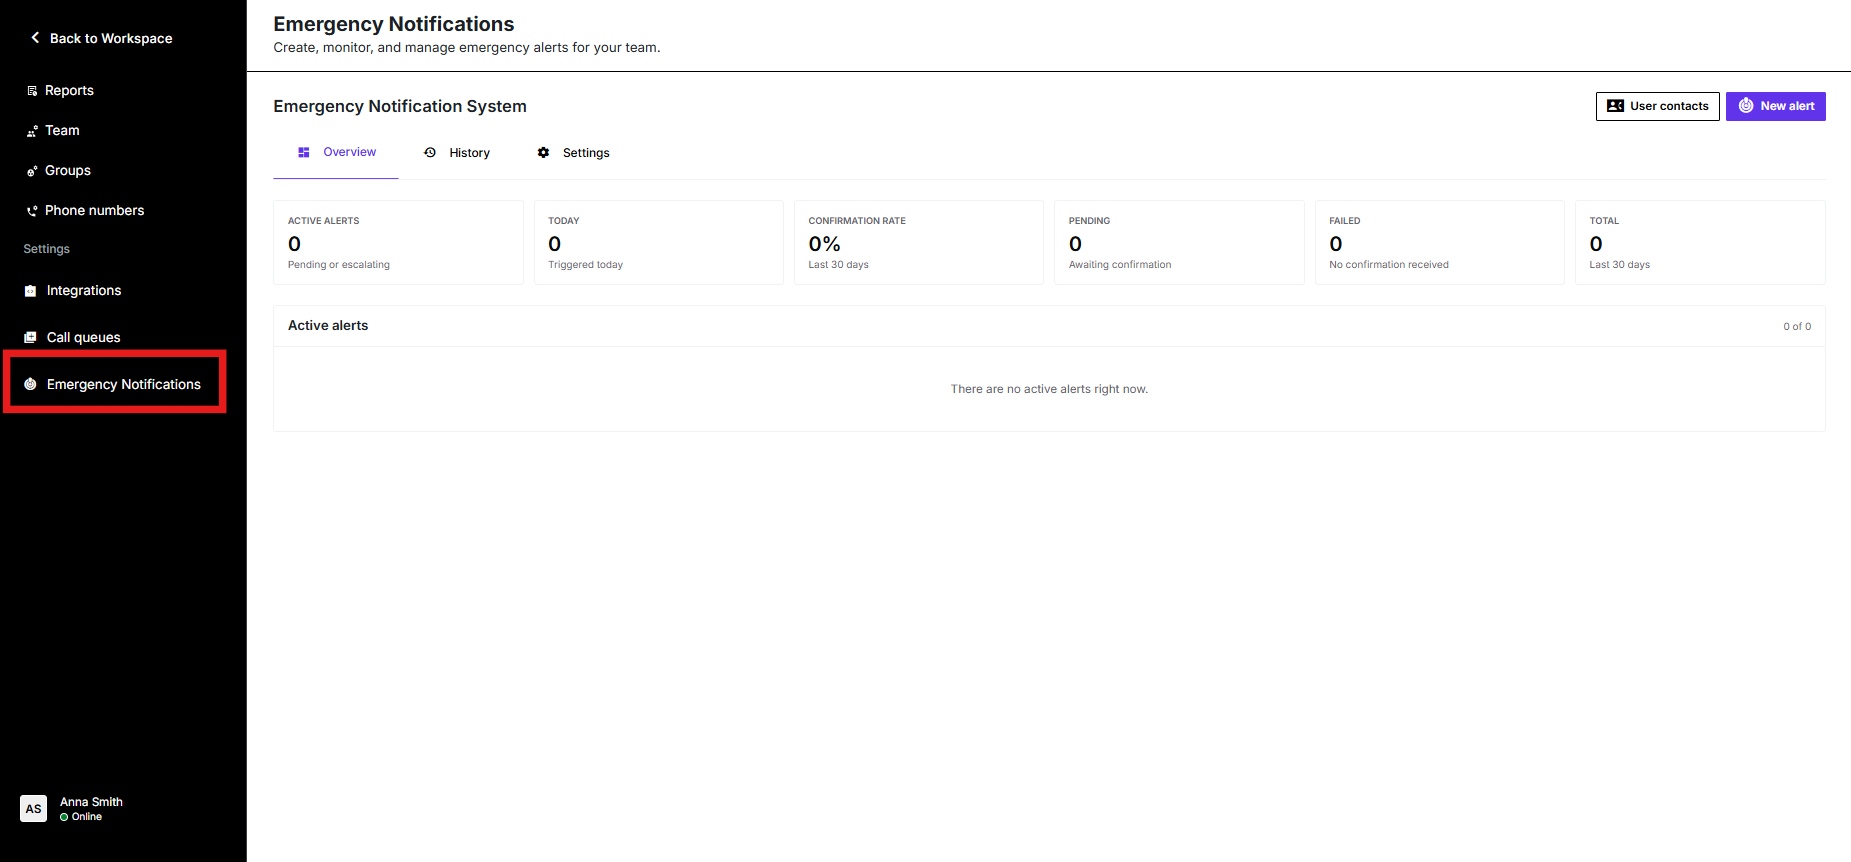
The Emergency Notification System (ENS) uses a configurable multi-level escalation workflow to maximise the chances of reaching recipients and collecting confirmation. Each escalation level is triggered only when the previous level does not receive confirmation within the configured time window.
ENS supports multiple notification channels that can be used in different escalation sequences depending on the alert configuration. Supported channels include push notifications, internal calls, phone calls, and SMS messages
The order of escalation channels is configurable. ENS does not enforce one fixed sequence, which means administrators can decide whether the alert should begin with a push notification, an internal call, SMS, or another configured channel, depending on the use case and urgency of the event.
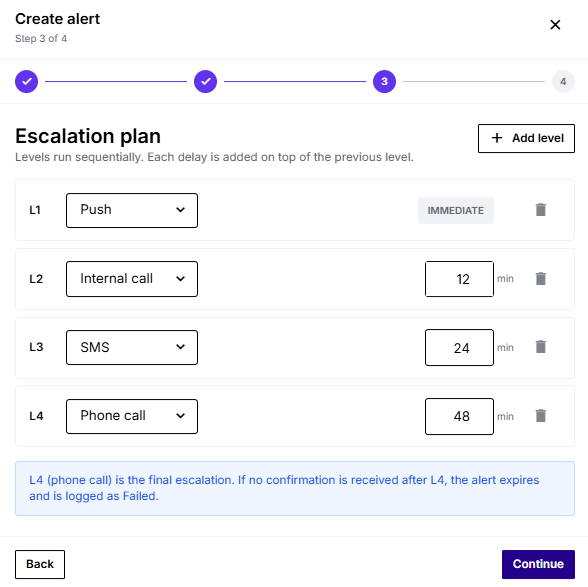
If no confirmation is received after the final escalation level remains active for its configured timeout period, the alert expires and is recorded as failed.
Push notifications are delivered directly inside the PhoneHQ application. Recipients can review the alert and confirm receipt from within the app.
Internal Call
An internal call is an in-app voice call delivered through PhoneHQ. This provides a more visible and audible alert than a standard push notification and helps reach recipients who may have missed the original message.
If configured as part of the escalation plan, ENS can initiate an outbound phone call to the recipient. During the call, recipients can confirm receipt using the configured keypad digit.
ENS can also send an SMS message as one of the escalation levels. When SMS confirmations are enabled, recipients can confirm receipt by replying with an accepted confirmation keyword.
Creating a new alert is a four-step process that allows administrators to define the type, content, recipients, and escalation plan before activation.
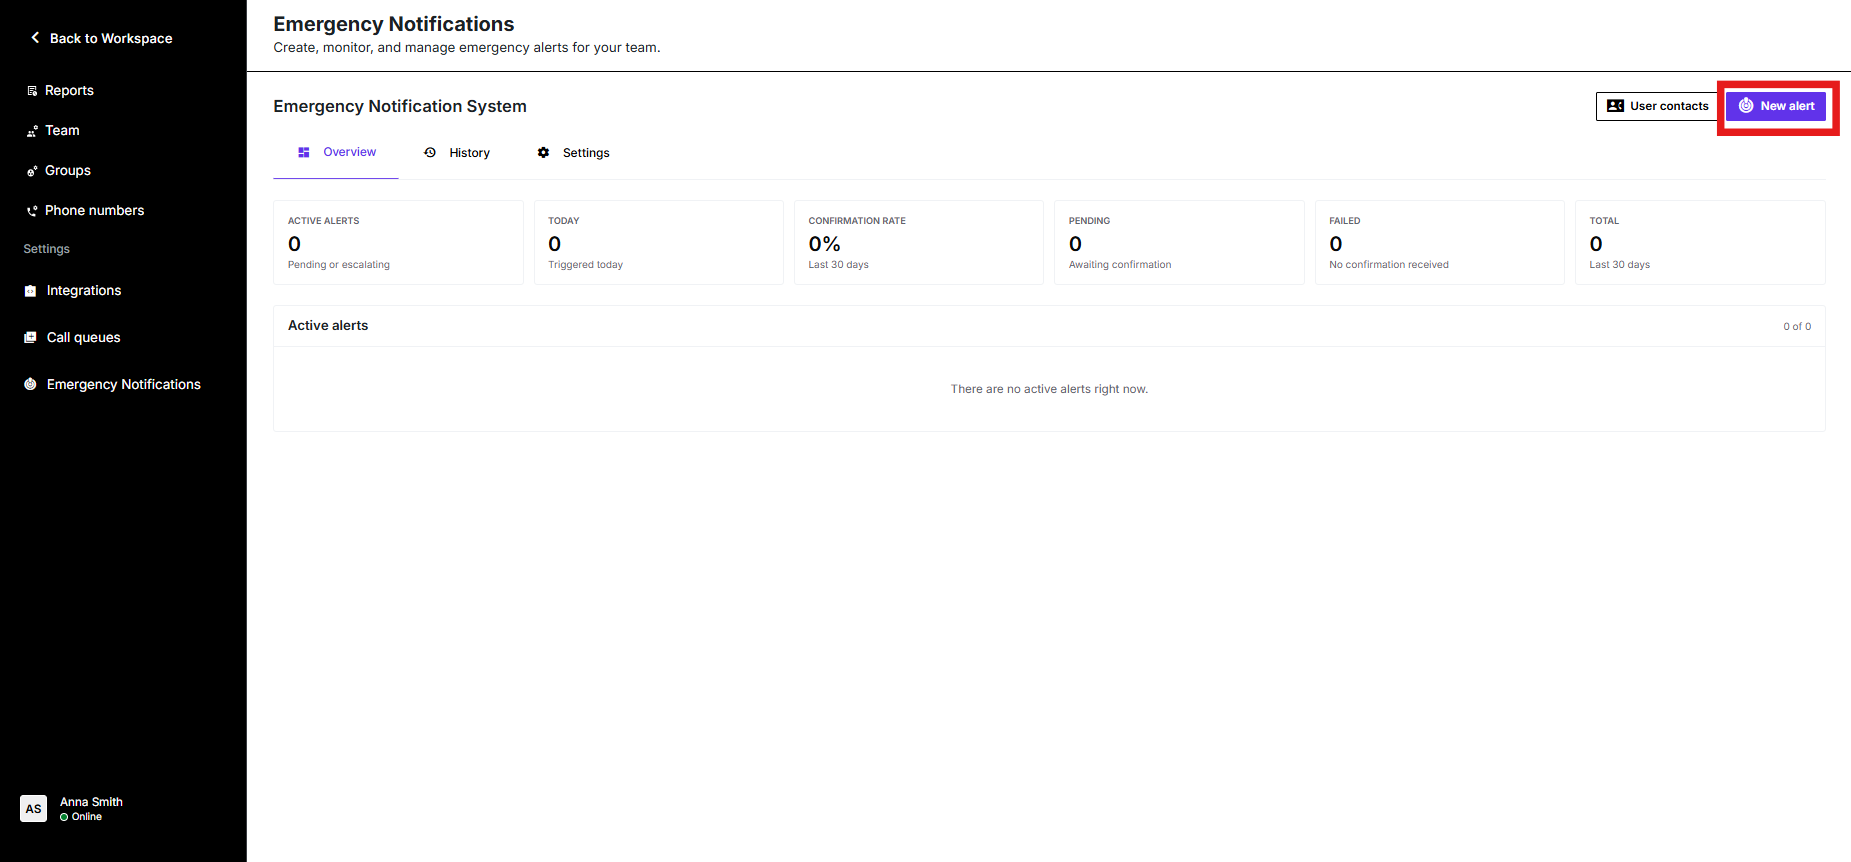
Choose the alert category that best matches the situation:
Fraud
Task
Policy
Custom
Each alert type includes a predefined escalation cadence that can be adjusted later if needed. This helps speed up configuration while still allowing flexibility for different scenarios.
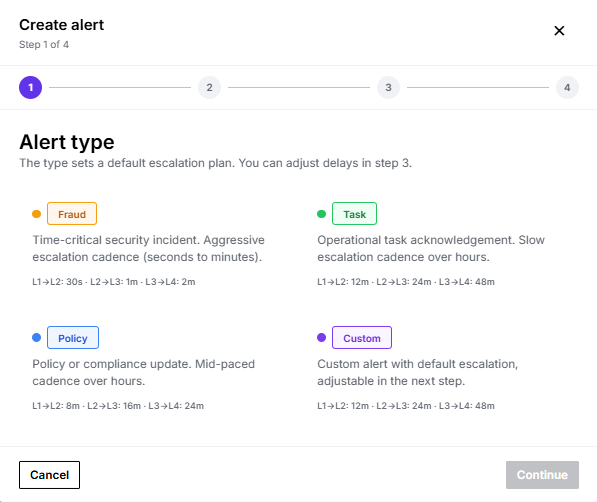
Provide the information recipients will receive:
Alert name – a short, identifiable title for the alert.
Alert message – the message shown to recipients in the application and related alert views.
Voice prompt text – the text used to generate the spoken message for voice-based escalation channels.
The voice prompt is automatically converted into speech using text-to-speech technology and is played during internal calls and phone call escalations. Administrators can also select the notification language, voice profile, and the target groups that should receive the alert.
Review and modify the escalation plan if necessary. Delays between levels are cumulative, which means each next level starts only after the previous one has completed its configured waiting period.
The order of escalation channels is configurable, so administrators can decide whether push notification, internal call, SMS, or phone call should be used first. This allows each alert to follow a workflow that matches the operational priority and response model.
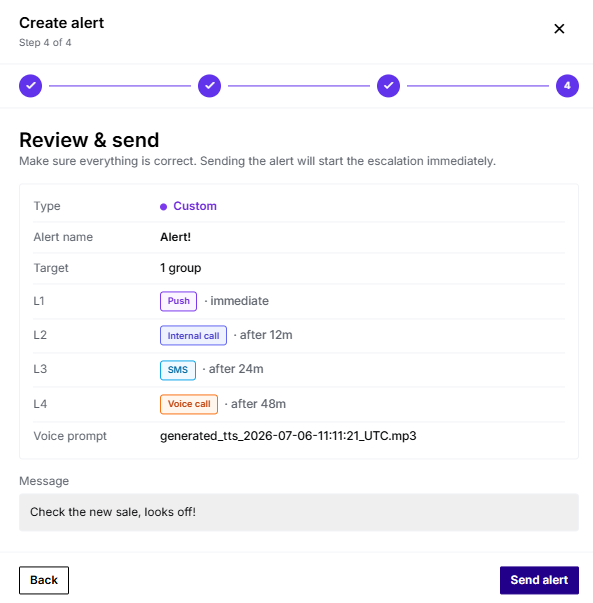
Once the alert configuration has been reviewed, activate the alert. ENS will immediately begin notifying the selected recipients and tracking confirmation responses across the configured escalation levels.
ENS includes dedicated views for monitoring both active and historical alerts in the Emergency Notifications module. The Overview area presents active high-level operational information such as active alerts, alerts triggered today, pending confirmations, failed alerts, and total alerts in the tracked period.
The History area provides a searchable and filterable list of previous alerts, including information such as alert ID, type, title, target recipients, status, confirmation rate, and send timestamp. This helps administrators review alert activity and track outcomes over time.
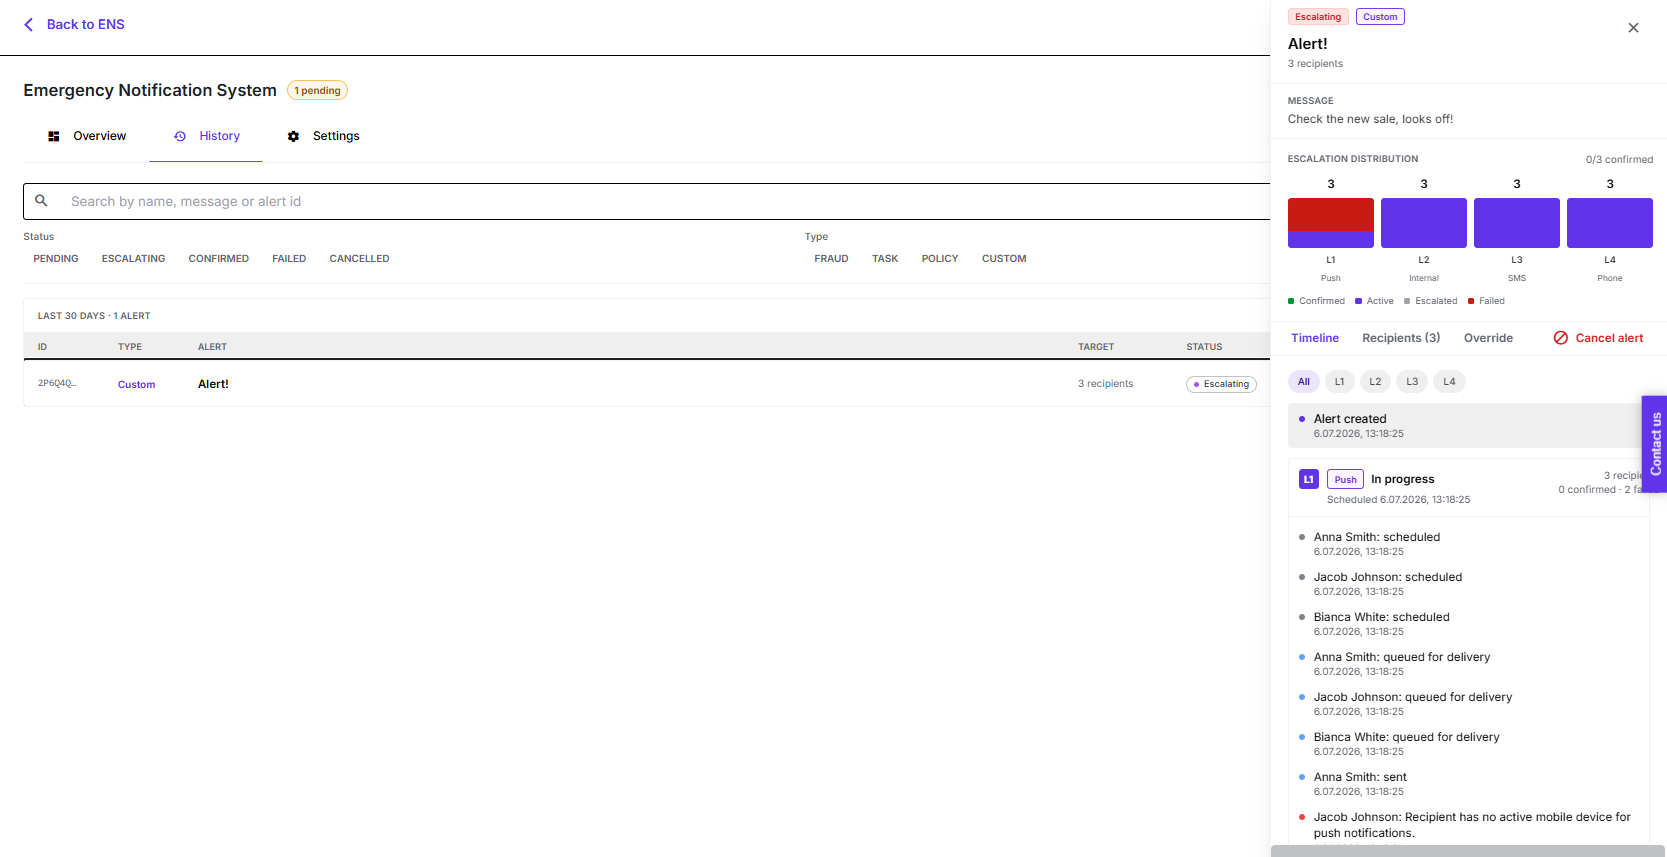
When the operator clicks on a specific alert in the history view, the system opens a detailed panel for that alert. In this detail view, they can see key information such as the alert ID, type, title, target recipients, current status, confirmation rate, and the exact send timestamp.
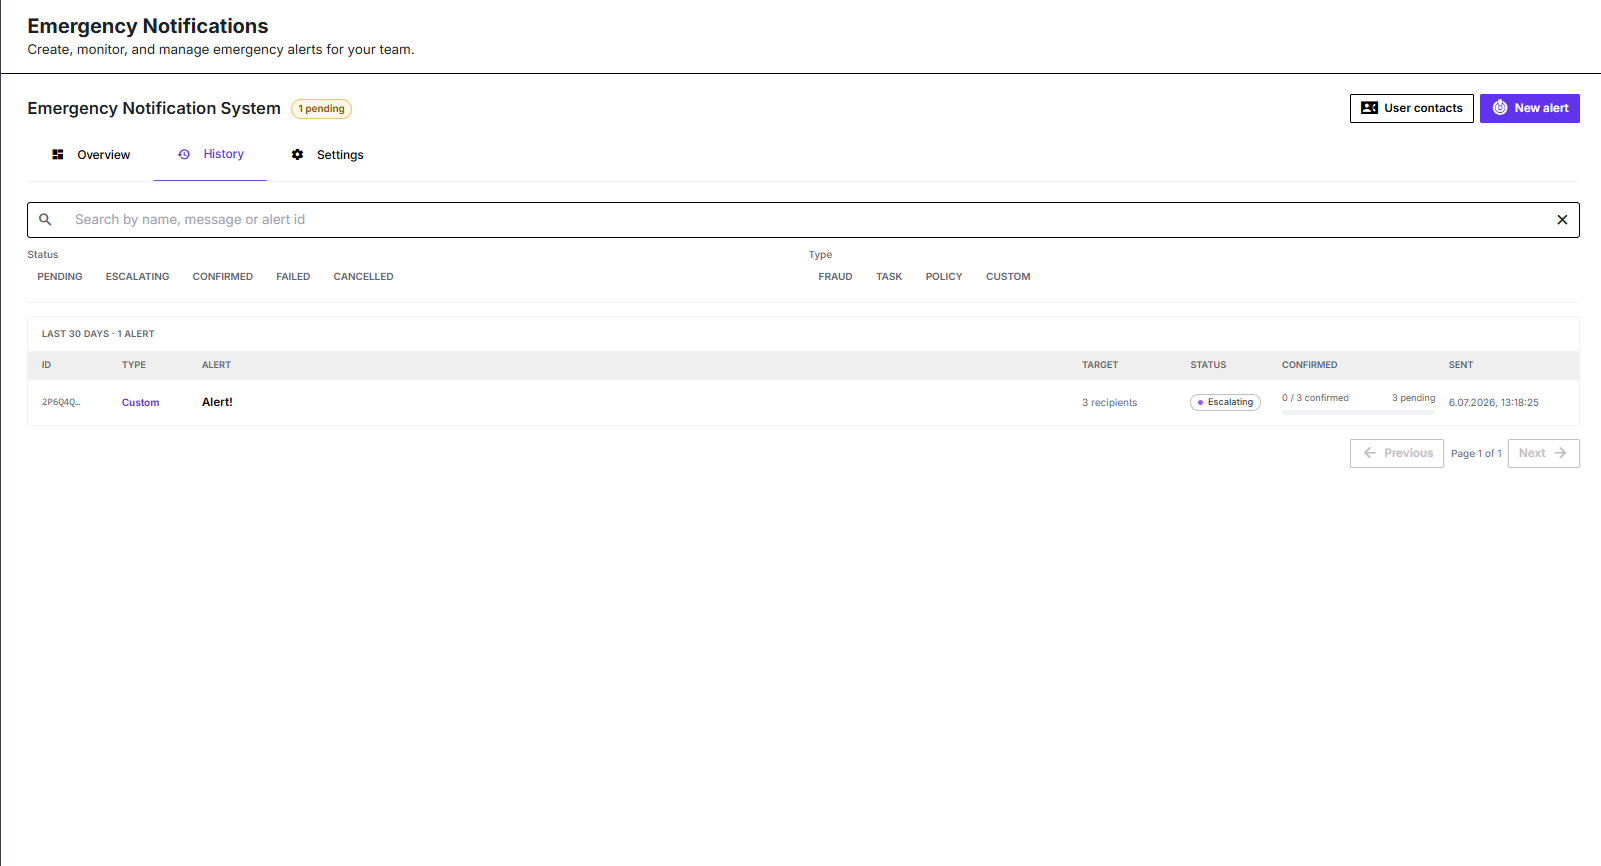
Alert ID
The alert ID is the unique identifier assigned to each alert in the Emergency Notification System
It allows admins to quickly search, filter, and reference a specific alert in logs, dashboards, or reports.
The alert type indicates the category or purpose of the alert, for example, fraud, task, policy, or a custom notification.
Using standardised types helps reporting (e.g., how many fraud alerts in the last 30 days) and ensures the right workflows and escalation rules are applied.
The title is the short, human‑readable name of the alert that appears in lists and on recipients’ devices.
A good title summarises the situation in a few words (e.g., “Payment fraud detected” or “System outage in Region A”), so users immediately understand the context.
Target recipients define who should receive the alert: a specific group, department, location, or the entire organisation.
The system uses these targeting rules to deliver the message only to relevant people, reducing noise and improving response quality.
Status shows the alert's current lifecycle stage, such as pending, escalating, confirmed, failed, or cancelled.
Statuses info:
Pending – the alert is created and scheduled, but not fully delivered yet.
Escalating – the system is actively moving through escalation levels (e.g. push, SMS, phone) to reach recipients.
Confirmed – enough recipients have acknowledged the alert, so the system treats it as successfully handled.
Failed – delivery or escalation did not succeed (e.g. technical error, unreachable contacts), and confirmations are missing.
Cancelled – the alert was actively stopped by an operator before completion, so no further notifications are sent.
The confirmation rate is the percentage of targeted recipients who have acknowledged the alert (for example, by clicking a confirmation button or replying).
The send timestamp records the exact date and time when the alert was dispatched to recipients.
When an individual alert is opened, ENS provides more detailed operational insight, including escalation distribution, confirmation counts, recipients, override options, and a full timeline of each escalation level. This makes it easier to review how the alert progressed and where confirmations were collected or missed.
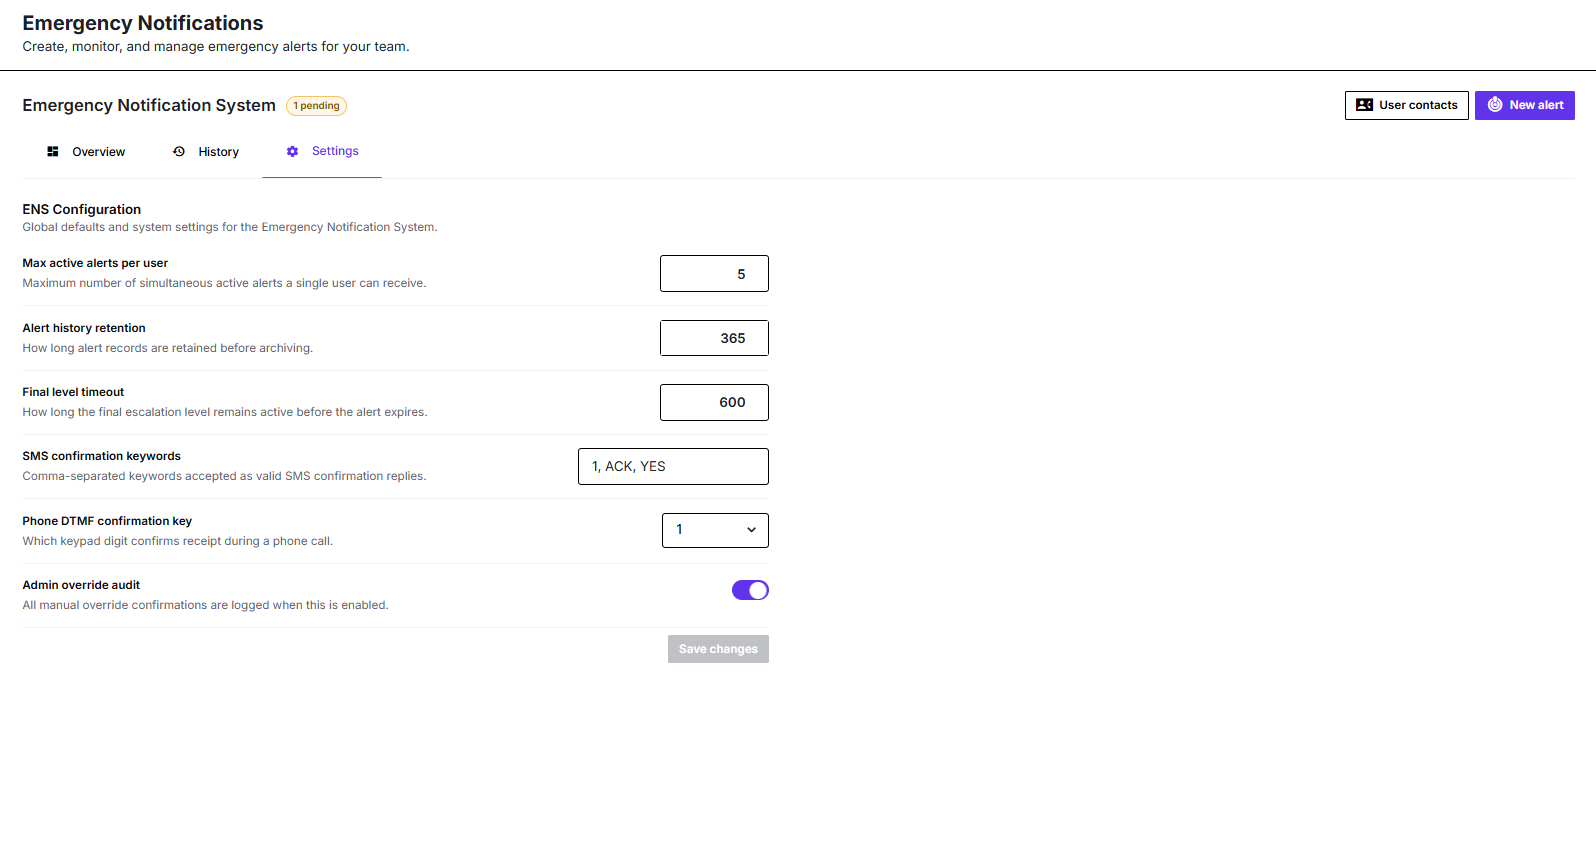
Administrators can configure global ENS settings that apply across the emergency notification system. These settings are available in the Settings section of the Emergency Notifications admin area.
Available configuration options include:
Maximum Active Alerts per User – defines how many active emergency alerts a single user can receive at the same time.
Alert History Retention – specifies how long completed alert records are stored before archiving.
Final Level Timeout – determines how long the final escalation level remains active before the alert automatically expires.
SMS confirmation keywords – defines which SMS reply keywords are accepted as valid confirmations.
Phone DTMF confirmation key – defines which keypad digit confirms receipt during a phone call.
Admin override audit – records manual confirmations, acknowledgements, and overrides performed by administrators for auditing and compliance purposes.
ENS supports multiple confirmation mechanisms depending on the channel used for delivery. Recipients can confirm alerts directly from the app, during a voice call using the configured keypad digit, or by replying to an SMS with a valid confirmation keyword when SMS confirmations are enabled.
This multi-channel confirmation model helps administrators verify not only that an alert was sent, but also that it was actively acknowledged by the intended recipients.
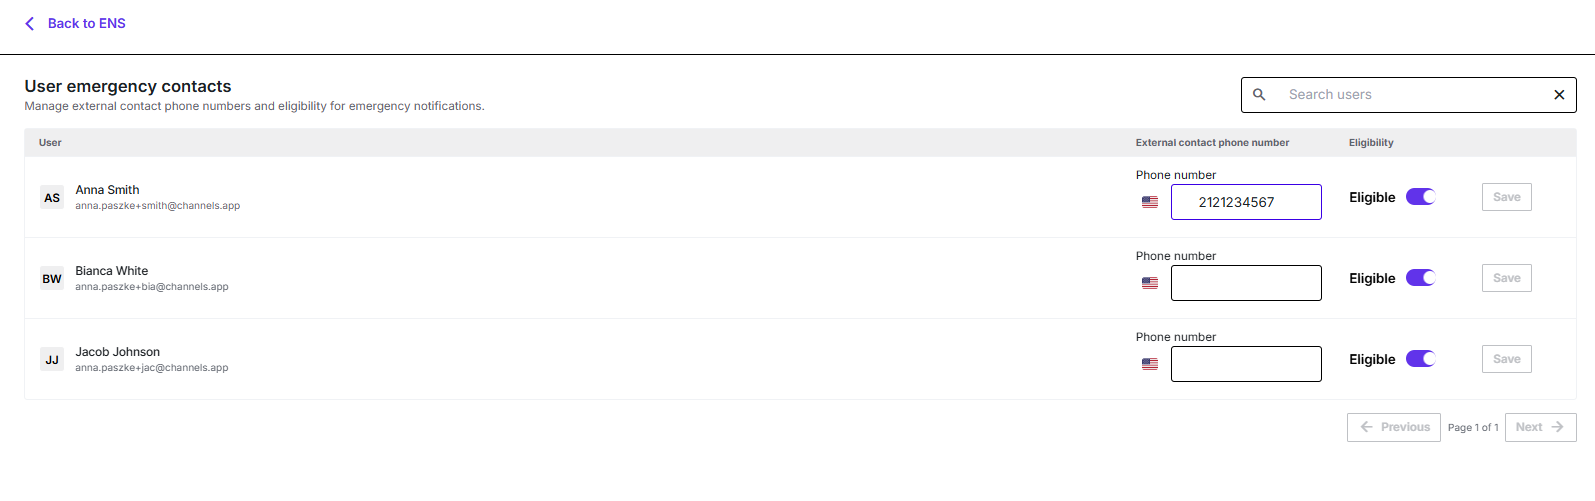
ENS supports the management of emergency contact details for each user. Administrators can configure external contact phone numbers and define whether specific users are eligible to receive emergency notifications.
This is especially important for channels such as SMS and outbound phone calls, where an external number may be required. It helps ensure that critical notifications can still reach the appropriate people when other communication paths are unavailable.
ENS is also visible from the user perspective in the PhoneHQ mobile application. Emergency alerts can appear as prominent banners at the top of the screen, allowing recipients to quickly review the message and confirm it directly.
The mobile interface also includes Notification history, where users can review received alerts and their confirmation status, including views such as All, Pending, and Confirmed.
In addition, users can access My emergency alerts after clicking their profile icon. This provides a dedicated place to review their own ENS-related notifications from the user side.
Dedicated ENS phone numbers used for outbound emergency calls and SMS notifications are managed by PhoneHQ Support. These numbers are reserved exclusively for ENS communication and cannot be assigned to individual users.