This section allows you to manage user groups and the resources assigned to them.
Log in to your account on the Web Portal.
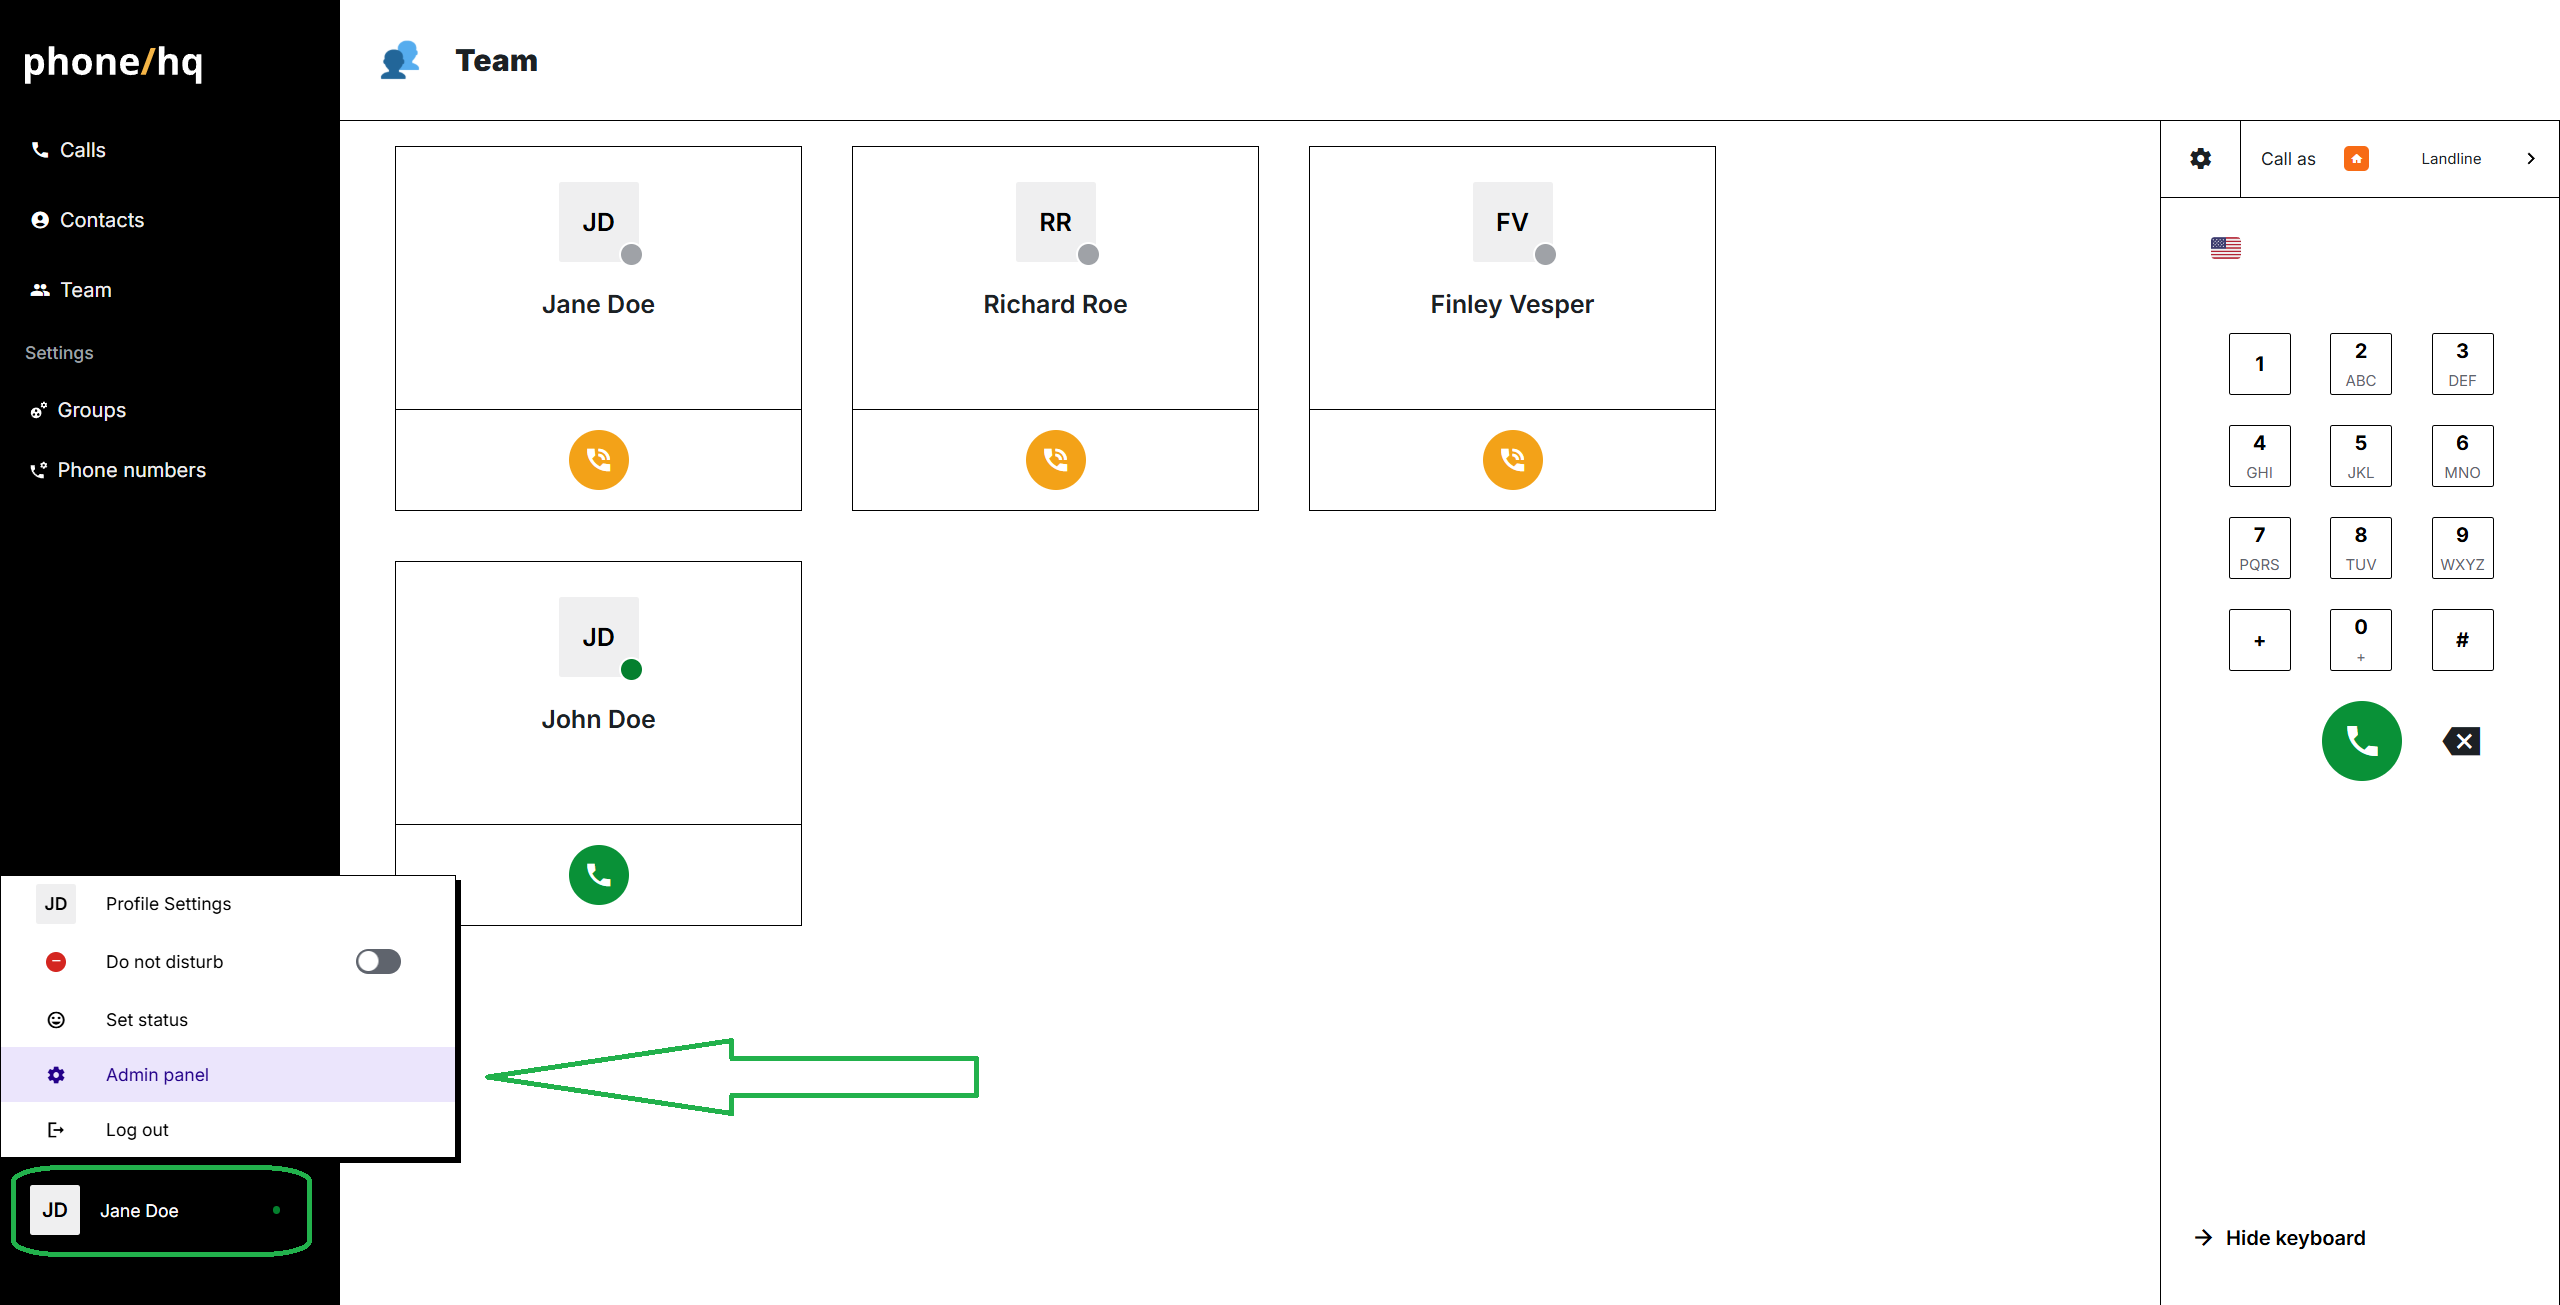
Go to your profile menu (bottom left corner of the screen).
Click on the “Admin” bar.
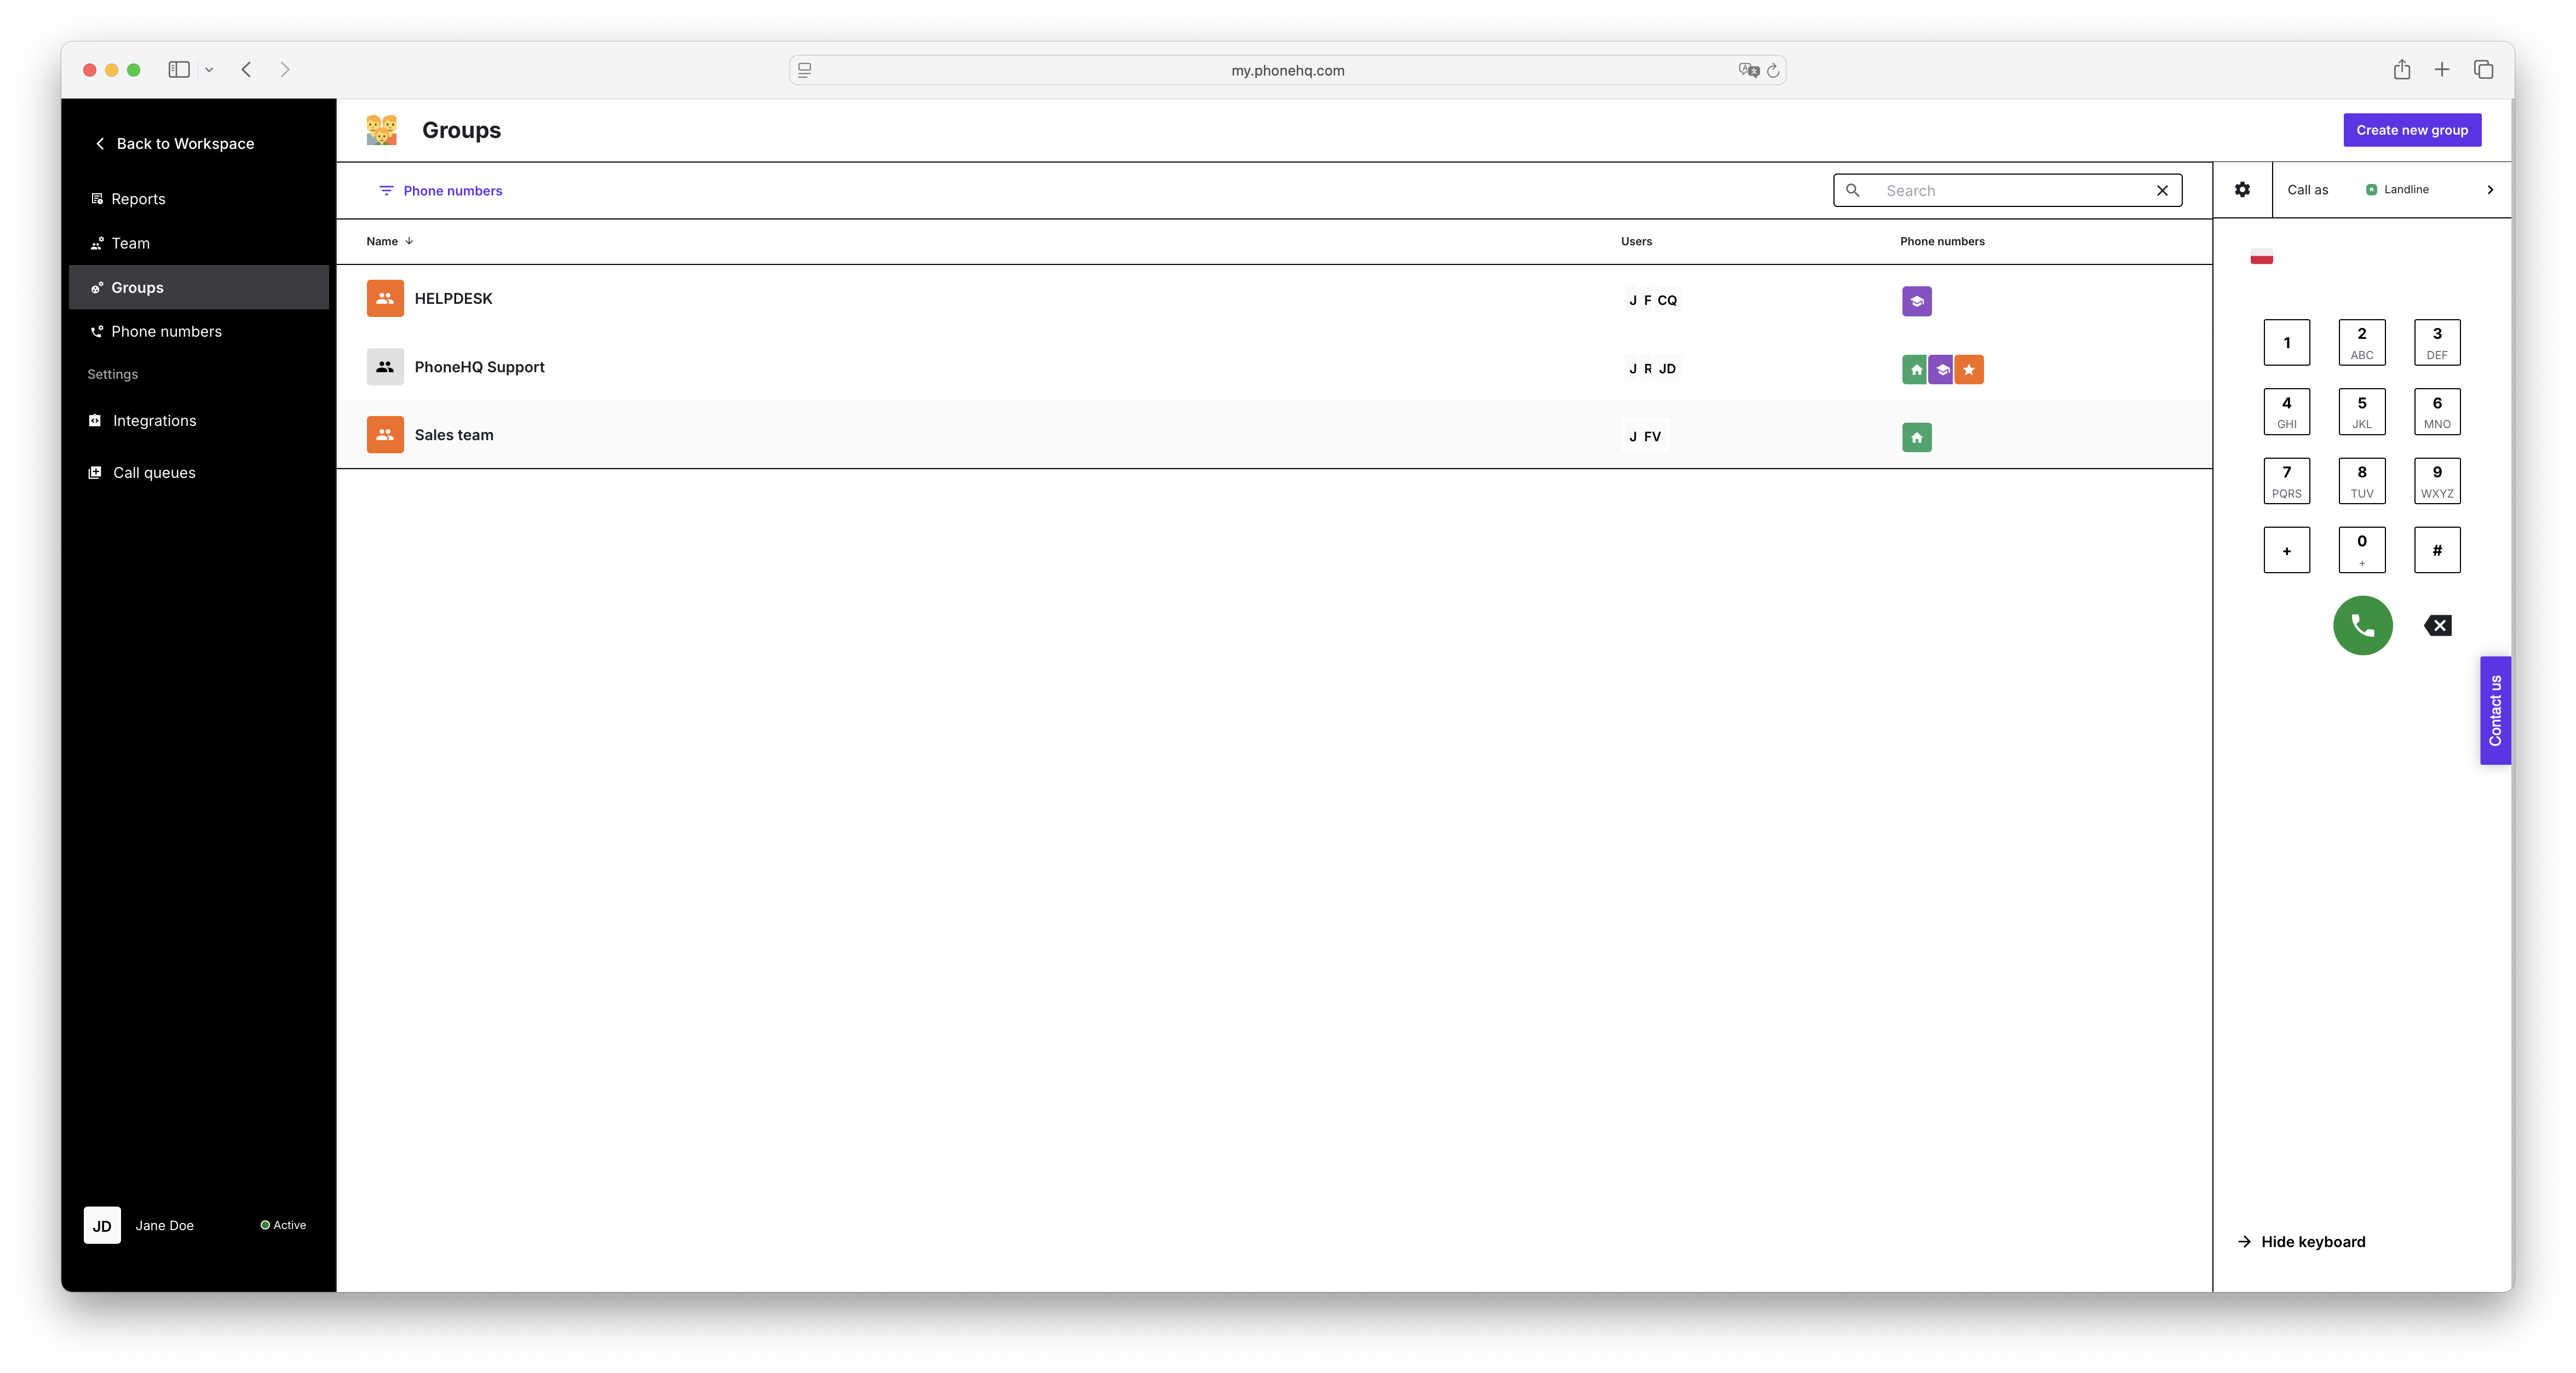
On the left side of the screen, you'll see the menu. The currently selected tab is "Groups".
The main part of the screen displays a list of groups in a table format.
The table contains the following columns:
Name: The name of the group (e.g., "PhoneHQ Support," "PipedriveContacts").
Users: A list of users belonging to the group. Their profile pictures or initials are displayed (e.g., AP, MM).
Phone numbers: The phone numbers assigned to the group. Country flag icons or other number labels are displayed.
Above the table, you'll find:
"Phone numbers" filter: Allows you to narrow down the list of groups to those that use specific phone numbers.
"Search" field: Enables you to search for groups by their names.
In the top right corner of the screen, there's a "Create new group" button.
Go to the "Groups" tab: In the left-hand menu, click "Groups".
Browse the list of groups: On the screen, you'll see a table containing the names of the created groups, the list of users assigned to them, and the phone numbers they use.
Use the "Search" field: Type the name of the group you're looking for in the "Search" field located above the table. The list of groups will be filtered to display only those that match your search.
Use the "Phone numbers" filter: Click on the "Phone numbers" filter. A list of available phone numbers will expand. Select a number (or numbers) to see only the groups to which it is assigned.
Create a new group: Click the "Create new group" button located in the top right corner. You will be taken to the new group creation section in "Settings," where you can define the group's name, add users, and assign phone numbers.
Manage groups:
View a list of all existing groups in the system.
Display the details of each group, including the list of assigned users and phone numbers.
Create new groups using the "Create new group" button.
Filter and search:
Quickly search for groups by their names using the "Search" field.
Filter the list of groups based on the phone numbers assigned to them using the "Phone numbers" filter.
View resource assignments:
The "Groups" tab serves as a central place to view the assignment of phone numbers and users to specific groups, which facilitates the organization of teamwork and the management of communication resources.
1. What is a group used for in PhoneHQ?
Groups are used to organize users and assign shared phone numbers for communication and collaboration. This structure supports easier call routing, permissions
2. Can a user belong to more than one group?
Yes, a single user can be assigned to multiple groups. This allows them to work across departments or roles.
3. Can a phone number be assigned to multiple groups?
Yes, one phone number can be shared across several groups. Each group can manage its use separately according to access permissions.
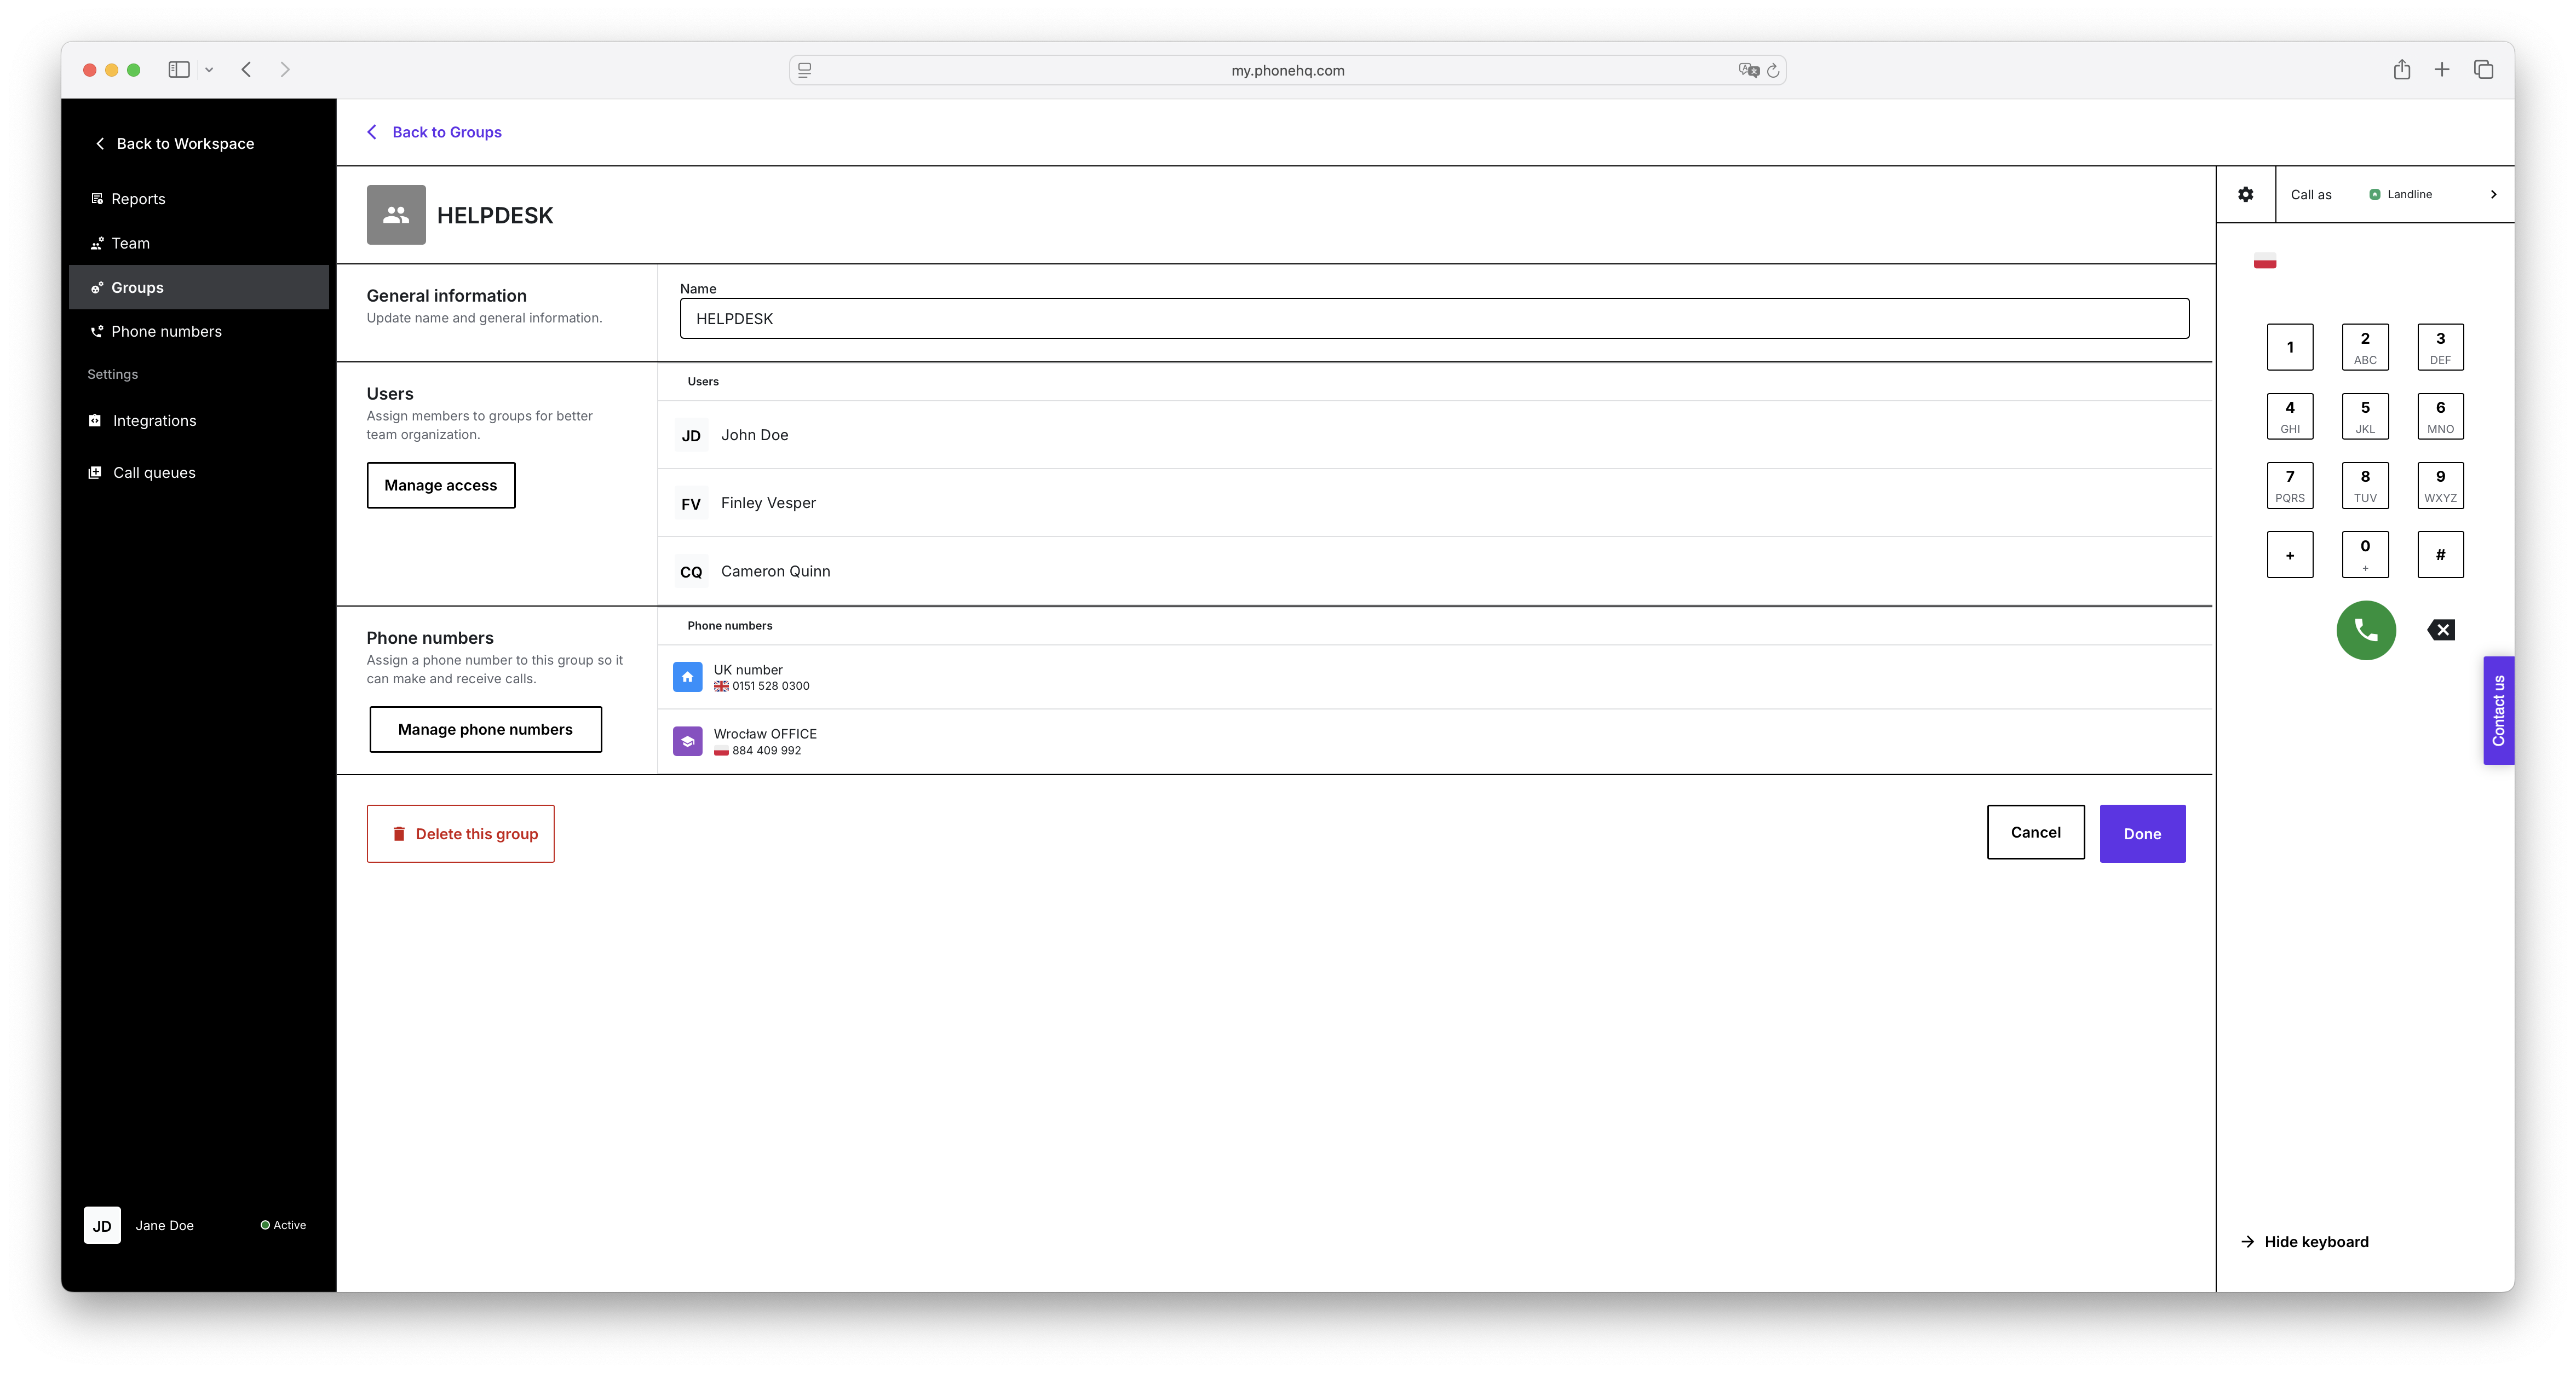
4. How do I edit a group once it’s created?
To edit a group, go to the “Settings” section, find the “Groups” sub-tab, and select the group you wish to modify. You can then update its name, users, and phone numbers.
5. Can I delete a group from the “Groups” tab?
No, the “Groups” tab is for viewing and filtering only. To delete or modify a group, you must go to the “Settings” → “Groups” section - only for admin role
6. Why don’t I see a certain user or phone number in a group?
It’s possible that the user or number has not been assigned yet. Group assignments must be configured manually in the settings.
7. What does the phone number filter do?
It helps you find which groups are using a specific phone number. This is useful when managing resources across multiple teams.
8. What happens when I click “Create new group”?
You’ll be redirected to the “Settings” area where you can define the new group’s name, members, and associated phone numbers.
| TermDefinition |
Groups Tab | A section in PhoneHQ where you can view all user groups and see which users and phone numbers are assigned to each group. |
Group | A collection of users who share access to certain phone numbers and communication resources (e.g., "Sales Team", "Support Team"). |
Users Column | Shows users in a group, typically represented by profile photos or initials (e.g., AP, MM). |
Phone Numbers Column | Displays the phone numbers assigned to each group, often with country flag icons or labels for easier identification. |
Search Field | A field that lets you quickly find a group by typing its name. |
Phone Numbers Filter | A dropdown that allows you to filter groups by the phone numbers assigned to them. |
Create New Group | A button that leads to the group creation form in the “Settings” section, where you can define group properties and assignments. |
Assignment | The act of linking users and phone numbers to a group so that group members have shared access to those communication resources. |
Settings → Groups | The configuration area where you can actually create, edit, or delete user groups. The “Groups” tab is for viewing and filtering only. |
Found a mistake or missing article? Contact PhoneHQ Support and let us know!
